This article was last updated on July 6, 2022
MetaMask is the most popular crypto wallet on the planet. Because of this, there are many who wish to know how to work and navigate through it. One particular thing you can do is add networks, such as Fuse, to MetaMask.
It is actually very easy to add networks to MetaMask, which is what we will show you how to do in this article. Not only that, but we will give you exact instructions on how to add the Fuse network to MetaMask through your browser and on your mobile device.
Additionally, we will give you some bonus information about Fuse and MetaMask in later sections.
If you are new to the MetaMask network, we suggest checking out our extensive article focusing on what the wallet does, how it works, and many other topics surrounding it. We explain in great detail why you might need a MetaMask wallet, how secure is it, and how to create your first account.
Leaving that aside, let’s focus on the topic at hand and get right into it.
Why Add Fuse Network to MetaMask?
There are a couple of notable reasons why you might want to connect Fuse to MetaMask. Here are some of them:
- Ability to explore and access dApps on Fuse.
- Testing different features.
- Holding FUSE token.
- Security and safety
How to Fuse Network to MetaMask – Extension/Browser
If you are using your browser, there are two main ways to add the Fuse network to your MetaMask wallet.
- Using Chainlist.
- Manually through MetaMask
1. Adding the Fuse network to MetaMask is very easy if you do it through the official Chainlist website. Once you open Chainlist, you need to search for Fuse. You will get 8 different results. Depending on your needs you can select a different network. We assume that you are looking for the main Fuse network, which is going to be the first option in the top-left corner.
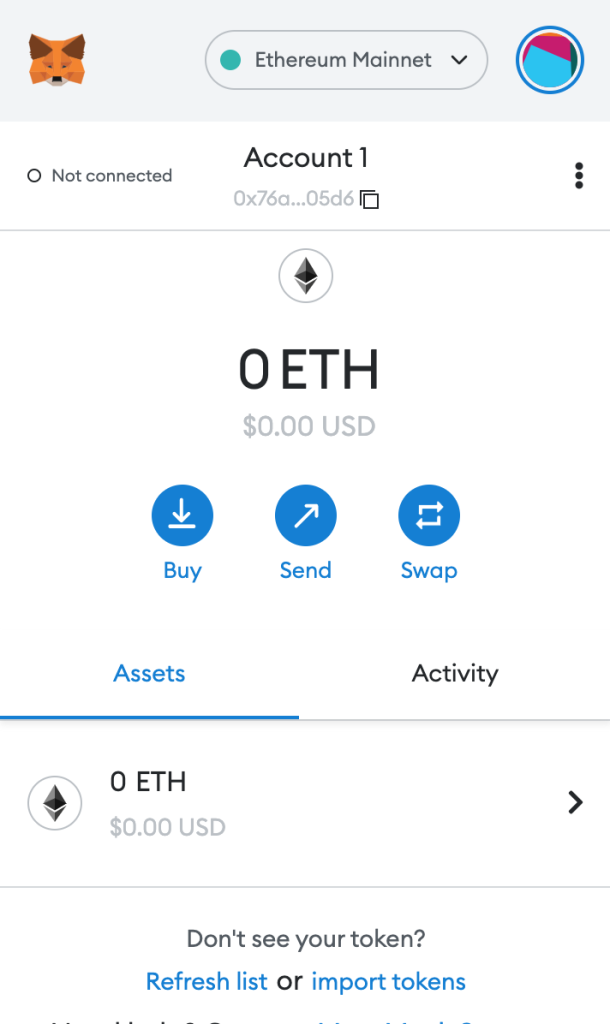
2. Adding Fuse Network through MetaMask manually is a bit longer a process. First, you need to open your MetaMask browser extension. Click on the current Mainnet in the top-middle section. By default, this should say “Ethereum Mainnet”.
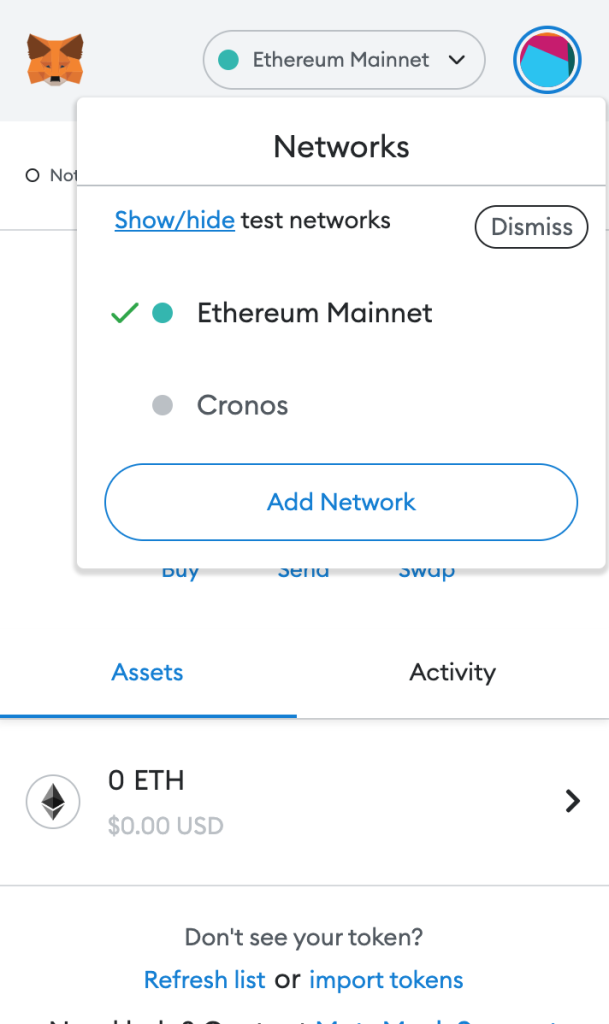
This will open a drop-down menu, where you need to click on “Add Network”. Here, you need to manually enter the network name, RPC URL, Chain ID, currency symbol, and block explorer URL.
See the sections below for an in-depth guide on how to do both. We also have a section, where we help you add the Fuse network to MetaMask on mobile devices.
How To Add Fuse Network to MetaMask – Chainlist
- Open Chainlist.
- Search for Fuse and click “Add Network”
- Confirm the action in MetaMask
1. Open Chainlist
Open the Chainlist official website. It should look a little something like the image below.
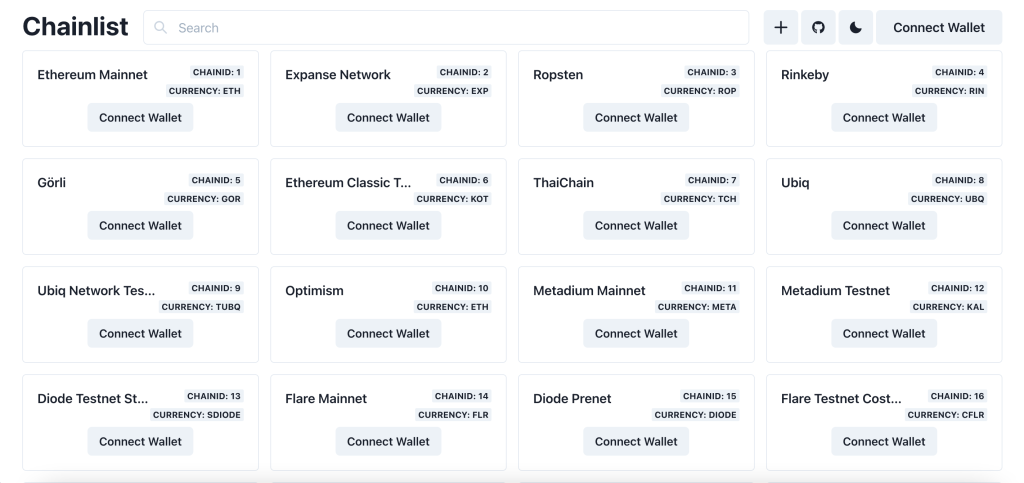
Chainlist is an explorer website where you can look for addresses and information.
Once you open the website, proceed with the next step in our guide.
2. Search for Fuse & Click “Add Network”
Once you open Chainlist, use the search bar at the top and type in Fuse. You will see a couple of different results. Depending on your needs you can add a different network. However, the main one you are probably looking for is the one with ChainID: 122, which is the first result. This is where you need to click on the “Add Chain” (or “Connect Wallet” first) button. See the image below for visualization.
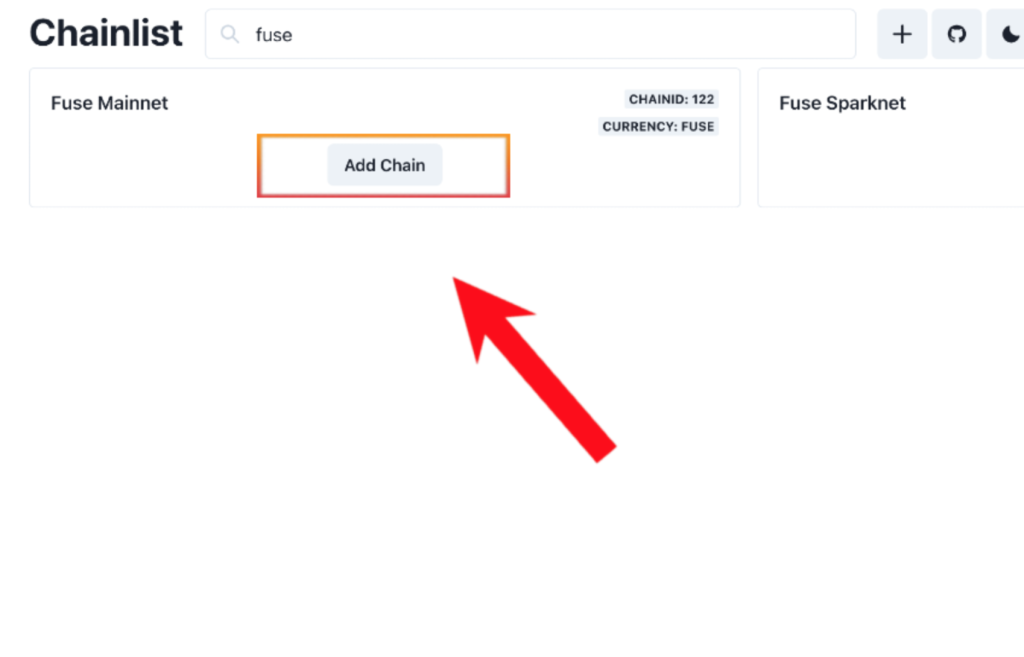
Furthermore, before clicking on that, make sure you log in to your MetaMask wallet account.
Once you complete this step, you can proceed with the next one.
3. Confirm the Action in MetaMask Pop-Up
Because MetaMask wallet allows you to connect to different dApps using your browser, you will see a pop-up once you click on “Add Chain”. Once that’s done, you will need to confirm the action twice before the network is added to your MetaMask wallet.
Additionally, do not worry if an error appears, as this is the case when adding any network to MetaMask.
Once that’s done, you will have the Fuse network added to MetaMask. Also, it will automatically switch to it once you add it.
How To Add Fuse Network to MetaMask – Browser
- Open MetaMask Extension
- Click “Add Network”
- Enter Fuse Network Details
- Save Changes
1. Open MetaMask Extension
Launch your MetaMask wallet extension in your browser. Make sure you log in to your account.
If you do not have an account yet, you can see how to create one by following our dedicated guide. It only takes a couple of minutes.
Once you are done, proceed with the next step.
2. Click “Add Network”
Once you open your extension, navigate to the network selection section on the top. By default, it should say “Ethereum Mainnet”. Click on that, which will open a drop-down menu. Afterward, click on “Add Network”.
This will open a completely new window in a new browser tab. Once that happens, proceed with the next step.
3. Enter Fuse Network Details
Once you get to the dedicated network section, you should see 5 empty fields. These are the Network Name, New RPC URL, Chain ID, Currency Symbol, and Block Explorer URL (Optional). Although the Block Explorer URL says optional, you actually need to add it.
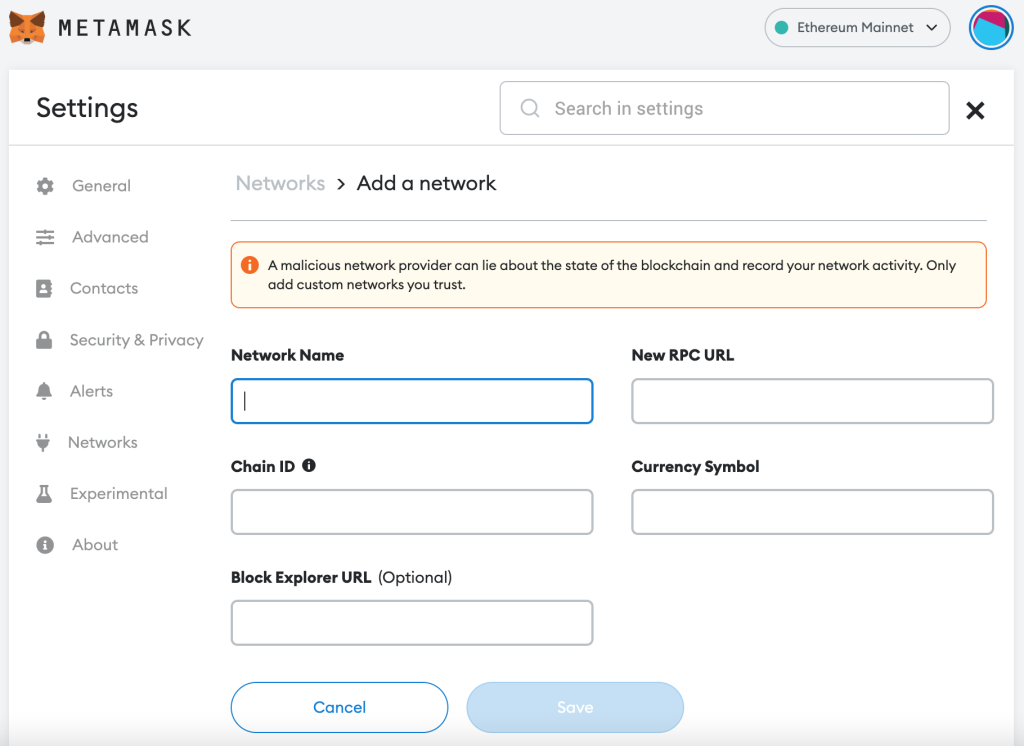
In the empty fields, enter the following information:
Network Name: Fuse Mainnet
RPC URL: https://rpc.fuse.io
ChainID: 122
Currency Symbol: FUSE
Block Explorer URL (Optional): https://fuse.io/
Because it is easy to make a mistake, you can simply copy & paste the information. Once you complete this step, there is only one thing left to do.
4. Save Changes
There’s a “Save” button below the empty field. Once you click on that, you need to confirm the action. Confirming the action adds the Fuse network to your MetaMask account.
This will automatically change your Mainnet to Fuse Mainnet. To switch back, just click on the Fuse Mainnet menu at the top.
How to Add Fuse Network to MetaMask – Mobile
Adding the Fuse network to your MetaMask mobile application is just as easy. However, there is only one way to do it.
That is through the official MetaMask mobile application. Unfortunately, Chainlist does not allow for the option of adding the network through their website. The “Add Network” Button is simply missing.
Nevertheless, to add the Fuse network to MetaMask on your mobile device, you need to follow 4 simple steps:
- Open MetaMask Mobile Application
- Navigate to Menu & Go To Settings
- Click “Add Network” & Enter Details
- Save Changes
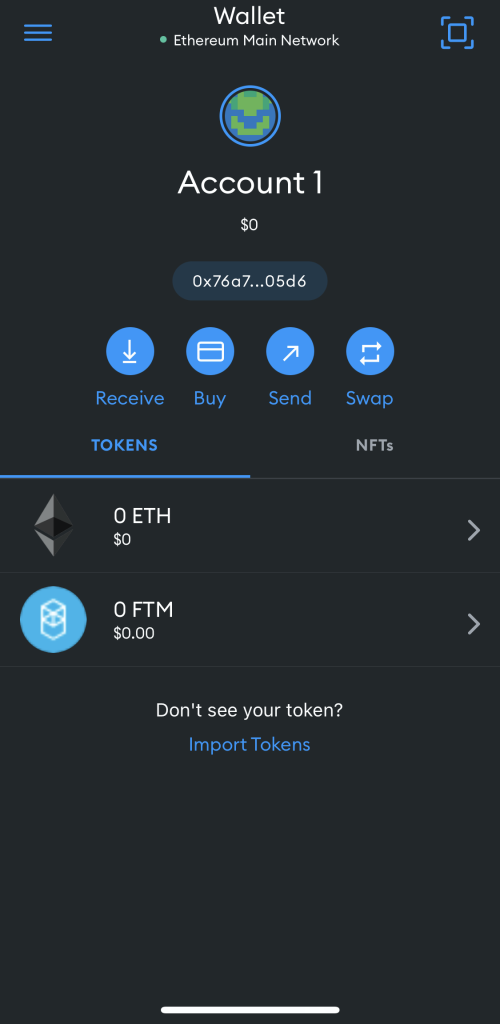
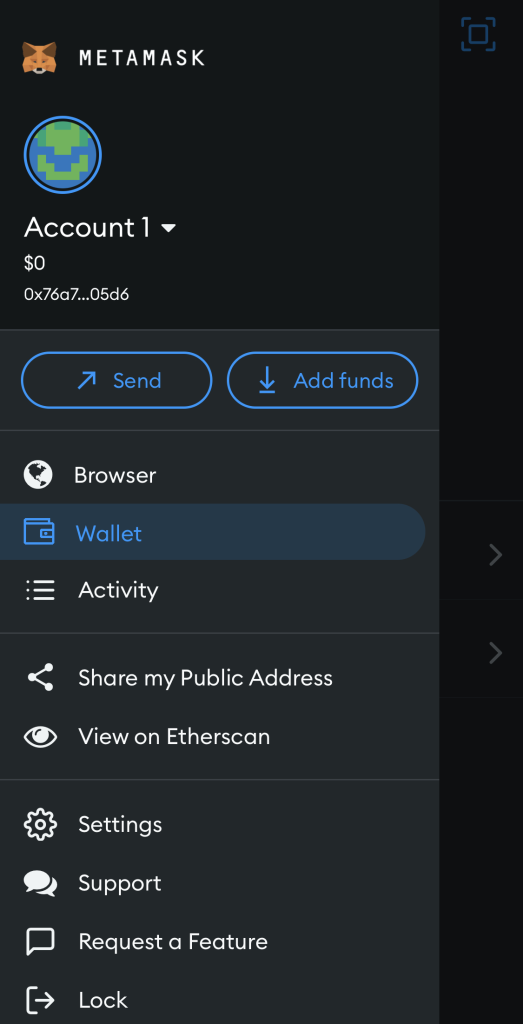
1. Open MetaMask Mobile Application
First of all, you need to open your MetaMask mobile application. My account has “dark mode” enabled, so it appears black, while yours might appear white.
However, if you don’t have it already, you can do so right now as it only takes a couple of seconds/minutes.
Log in to your account. Although, if you do not have an account, you can create one within a couple of minutes – follow this dedicated guide to create an account.
Once you open your application, you can proceed with the next step.
2. Navigate to Menu & Go To Settings
Once you open the application, you need to click on the hamburger menu located in the top-left corner of the screen. From there, you must swipe up and click on “Settings”.
Doing this will show you a number of different settings. Once that’s done, you can proceed.
3. Click “Add Network” & Enter Details
Once you are in the “Settings” menu, you need to go to the “Networks” section. Afterward, click on the “Add Network” button.
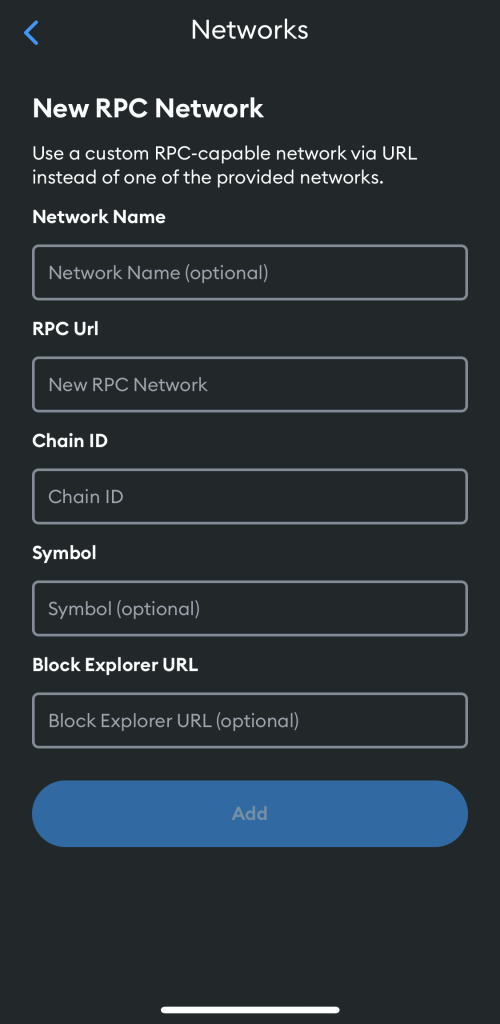
This will show you a couple of blank fields where you need to enter the following information in each:
Network Name: Fuse Mainnet
RPC URL: https://rpc.fuse.io
ChainID: 122
Currency Symbol: FUSE
Block Explorer URL (Optional): https://fuse.io/
Once that’s done, there is only one thing left to do.
4. Save Changes
Once you enter all the necessary information, you just need to click on “Add” at the bottom. This will automatically add the Fuse Network to your MetaMask wallet.
These changes will be applied to both your browser and mobile application. Furthermore, by adding Fuse to the wallet, it will automatically become the chosen mainnet.
How to Change Network – MetaMask
To change your MetaMask mainnet network, you need to open the extension or mobile application. Then click on the “Ethereum Mainnet” by default, or, if you have already added another network such as “Fuse Mainnet” click on that.

Here, you will be able to select any of the available networks you’ve added to the wallet. Once you do this, you can switch over from any network to another.
About Fuse
The Fuse network is a new player in the cryptocurrency world. It’s still early in development, even though it has been made public already. Yet, it’s already getting a lot of buzz because it’s designed to be more user-friendly than existing options like Bitcoin and Ethereum. One of the ways it does this is by using a consensus model called “Proof-of-Stake” instead of “Proof of Work.”
This means that people who hold Fuse tokens can earn interest on their investment just by holding the tokens, without having to put in the extra work required by Bitcoin miners, for example. Another cool thing about Fuse is that it includes built-in governance features, so users can vote on important decisions about the network.
This is something that other crypto projects are starting to do as well, but Fuse is one of the first to really make it user-friendly and integrated into the network from the start. If you’re interested in trying out a new cryptocurrency, Fuse is definitely one to keep an eye on!
About MetaMask Wallet
MetaMask is a crypto wallet that comes in the form of a browser extension (Chrome, Firefox, Brave, and Edge) or a mobile application (iOS and Android). It is well-known for being the best software wallet for ERC-20 tokens. In fact, the wallet only supports Ethereum-based cryptocurrencies and NFTs.
Nowadays a lot of people use MetaMask to connect to different decentralized applications (dApps). Most notably, people connect their MetaMask to PancakeSwap. There, they exchange Ethereum, for example, for another cryptocurrency that is not available in other crypto exchanges.
It also is a simple entry point to the world of DeFi. DeFi stands for decentralized finances, which is a term used to describe companies that look to provide open, permissionless, interconnected financial services. These services are usually lending and borrowing crypto, as well as other crypto-oriented banking services.
Most NFT marketplaces such as OpenSea support MetaMask. At the beginning of the crypto boom back in 2021, MetaMask got the spotlight as the most popular and easy-to-use crypto wallet to buy NFTs.
RELATED: “What is MetaMask?“
Final Thoughts
As you can see, adding a network to MetaMask is very easy. Fuse is no exception. If you want to add other networks, you can use the same method. All you need to do is find the necessary information and go through the process again.
We’ve also made sure to explain each and every step so that even if you are a total beginner you’d know what to do. As you already know, there are many use cases for adding the Fuse network to MetaMask.
Now that you have the Fuse network added to MetaMask, we hope you enjoy your new endeavors.